Adding a Window Seat for Extra Seating and Storage
If you’re looking for extra seating and storage space in a room, adding a window seat is a great way to go. Not only is it a great place to sit and relax, but it can also provide some much-needed storage space. Window seats are often overlooked but can really add character to a room while providing those two important functions.
In this DIY window seat guide, we’ll walk you through the steps of how to build a window seat, including how to make a bench, how to choose the right cushions and how to store items within the seat.
Time and Materials Needed
On average, it takes about five to seven hours to build a window seat. The time needed for the project may vary depending on the size of the window seat and the complexity of the design. In terms of materials needed, you’ll need some basic tools such as a saw, screws, drill, measuring tape and a hammer. Other materials you may need include foam, batting, fabric, plywood, and wood trim.
Step-by-Step Guide to Building a Window Seat
Step 1: Measure the Window Area
The first step in building a window seat is to measure the window area you want to use as your seat. Measure the length, width and depth of the area so that you can select the appropriate materials accordingly.
Step 2: Cut the Plywood and Attach the Base
Once you have the measurements, it’s time to cut your plywood pieces according to the measurements you took and assemble the base of the window seat. You can use screws to attach the pieces together.
Step 3: Add Foam and Stuffing
Now that the base of the seat is assembled, it’s time to add foam and stuffing. You can buy foam from a store and cut it to size so that it will fit your window seat. After cutting the foam, you can add stuffing for extra comfort.
Step 4: Cover the Foam with Fabric
The next step is to cover the foam with fabric. You can use any kind of fabric you like, such as cotton, velvet, or suede. Be sure to use fabric that is strong and durable enough to withstand daily use.
Step 5: Add Wood Trim
After the fabric is in place, it’s time to add wood trim around the seat. This will help to give the seat a finished look and add extra stability to it.
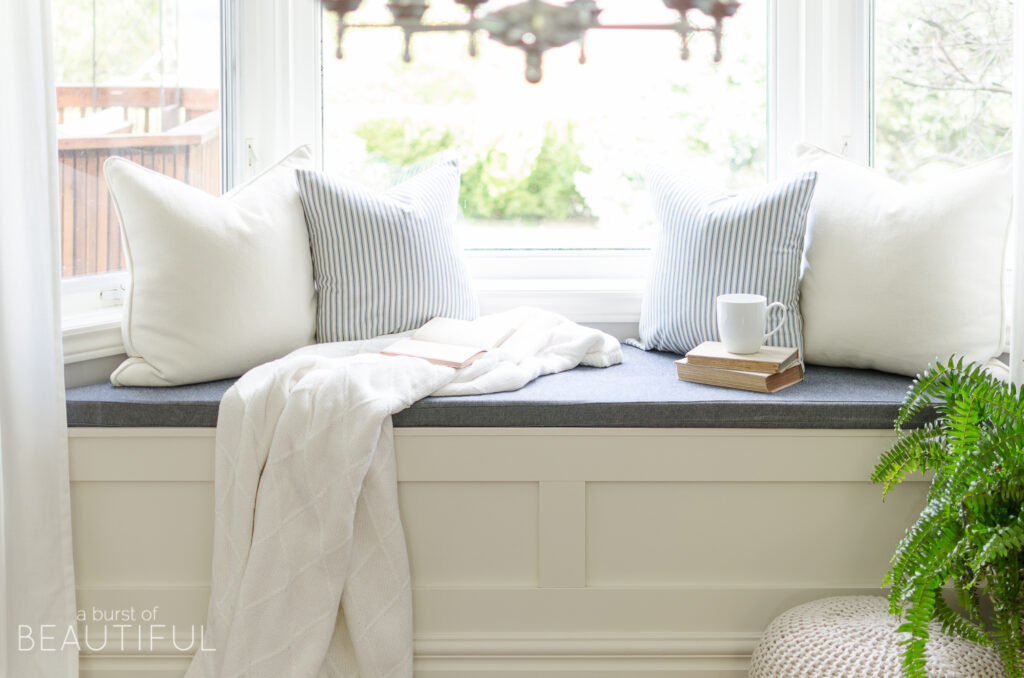
Step 6: Add the Cushions and Pillows
The final step is to add cushions and pillows to the seat. This will make it more comfortable and add extra style to the room. Be sure to choose pillows and cushions that are made from durable materials so they will last.
The Benefits of Adding a Window Seat
Adding a window seat to a room can provide a number of benefits. Not only does it provide extra seating and storage space, but it can also add style and character to a room. It can help to make a room look larger and brighter, as well as add a cozy, inviting feel to a room.
Precautions to Consider
When building a window seat, there are a few precautions you should consider. Make sure you follow all safety guidelines when working with tools and materials. Additionally, be sure to measure the area carefully before cutting any pieces of wood, as you want to make sure your window seat fits the space perfectly. Finally, if you’re installing a window seat over a window, be sure to check for any damage that may have occurred due to moisture.
Estimated Cost of Building a Window Seat
The cost of building a window seat will vary depending on the size and materials used. On average, the cost of building a window seat begins at about $150, but could range up to $500 or more.
Conclusion
Building a window seat is not as difficult as it may seem. With the right tools and materials, you can easily build a beautiful window seat that adds style and extra seating and storage to any room. Whether you want to build a basic seat or something more complex, the steps in this guide will help you get the job done.


